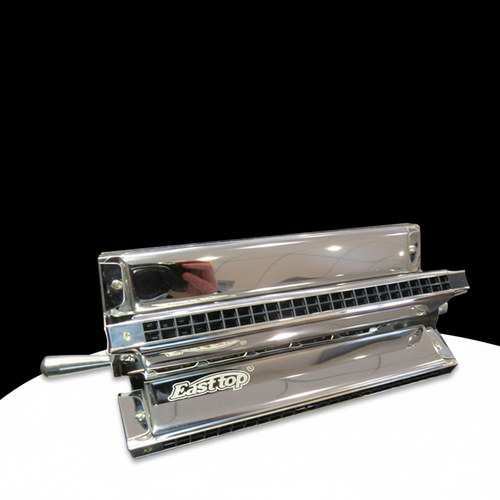
For players transitioning from a tremolo or blues harp to the chromatic harmonica, there is a universal, frustrating rite of passage:
You are in the middle of a beautiful phrasing, and suddenly, a specific hole goes completely dead as if glued shut. Or worse, it produces an annoying, rattling buzz during a loud passage.
In the harmonica community, this is known as the dreaded "stuck valve" or "sticking windsaver" problem. Many players mistakenly blame the build quality of their instrument. However, this is rarely a manufacturing defect; rather, it is a physical byproduct of the harmonica’s most critical component—the windsaver (valve).
Today, we will dive into the science behind this common pain point and provide a foolproof, step-by-step solution to keep your harp playing flawlessly.
1. The Science Behind "Stuck Valves"
To solve the problem, we must first understand why it happens. To maintain maximum airtightness, chromatic harmonicas feature tiny, dual-layered strips called windsavers (or valves) placed over the slots. Their job is to block air from escaping through the inactive reed when you blow or draw.
Because these valves are incredibly lightweight and responsive, they are highly susceptible to three main culprits:
Moisture Condensation (Temperature Drop): Your breath is warm and humid, while the metal reedplates of the harmonica are typically cold. When warm air meets cold metal, condensation occurs instantly. The surface tension of these water droplets acts like an adhesive, locking the valve against the plate.
Sugars and Mucins in Saliva: It is inevitable that trace amounts of saliva enter the mouthpiece. If you consume sugary drinks or food before playing, your saliva becomes sticky, turning into a literal glue for the windsavers.
Valve Fatigue and Warping: Over months of heavy use, the plastic or plastic-composite strips can lose their tension, become slightly warped, or shift out of alignment, preventing them from lifting cleanly.
2. The Step-by-Step Blueprint to Eliminate Sticking
Step 1: The Essential Pre-Play Ritual – Warming the Harp
This is the single most effective way to prevent condensation. Never blow hard into a cold chromatic harmonica.
Step 2: Adjust Embouchure and Control Saliva Flow
Excessive saliva is often a symptom of improper mouth positioning.
Retract Your Tongue: Avoid letting your tongue push too far forward against the slider. Instead, drop the back of your tongue to create an open cavity—similar to shaping your mouth for an "O" sound. Rely on deep abdominal diaphragmatic breathing to move air cleanly, rather than "spitting" air into the holes.
Maintain Oral Hygiene: Always rinse your mouth with water before practicing. Never play right after drinking coffee, boba, or eating.
Step 3: Mid-Performance Quick Fixes
If a note sticks abruptly during a performance or practice session, try these two immediate emergency measures:
The Sharp Pop: Give a quick, sharp draw or blow on the stuck note (or press the slide button rapidly) to break the surface tension of the water droplet with sudden air pressure.
Tap It Out: Hold the harmonica with the mouthpiece facing down and tap it firmly against your palm or a clean microfiber cloth to dislodge any trapped water.
Step 4: Deep Cleaning and Valve Maintenance
If a valve remains sticky after warming up, organic residue has likely built up on it. It’s time for a manual cleaning.
Tools Needed: A sheet of high-quality oil-blotting paper or lint-free lens cleaning paper (avoid standard facial tissues, as they leave fibers behind).
Method: Gently slide the blotting paper between the stuck valve and the reedplate. Press down lightly on the valve and pull the paper out to absorb moisture and residue. For stubborn grime, moisten a cotton swab with a tiny drop of high-purity isopropyl alcohol (95%+) and clean carefully, ensuring you do not dissolve the valve's adhesive backing.
3. When is it Time to Replace a Windsaver?
Windsavers are consumable parts. If you have thoroughly cleaned a valve but it continues to buzz consistently, or if you notice the outer layer is visibly curled away from the reedplate, it has reached the end of its lifespan.
We highly recommend keeping a standard harmonica maintenance toolkit handy. These kits include replacement valves of various lengths and dedicated adhesive. Using fine tweezers, simply peel off the old valve, scrape away residual glue, apply a microscopic dot of fresh glue, and align the new valve precisely over the slot.
🌟 Final Thoughts Mastering moisture control and windsaver maintenance is a milestone that marks your progression into a serious chromatic harmonica player. By implementing proper warm-ups and breathing techniques, you will transform your instrument into a highly responsive extension of your musical voice. Don't forget to bookmark this guide for your next practice session!