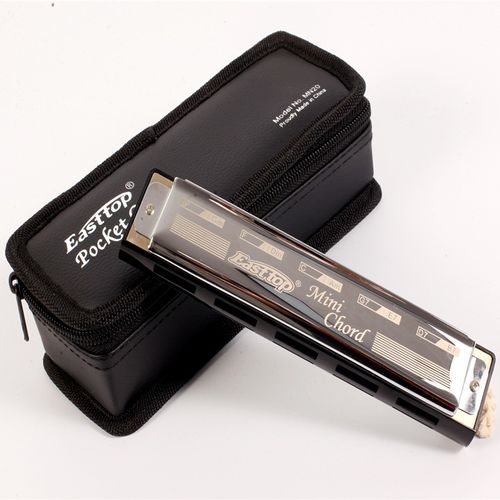
Article Body: How to Choose Your Next 10-Hole Harmonica: An Intermediate Upgrade Guide
Once you've mastered single notes, basic bending techniques, and a few foundation tunes on your starter C harmonica, you've officially crossed into the intermediate stage.
At this checkpoint, many players ask the same question: With harmonicas ranging from budget-friendly options to premium instruments, what actually matters when upgrading? Should I buy another key or invest in a higher-tier model?
This guide breaks down the key factors so you can make an informed, value-driven choice for your setup.
1. Beyond the Basics: What Intermediate Players Need
While beginners focus on basic playability, intermediate players require responsiveness, airtightness, and expressiveness.
Comb Material Matters:
ABS/Plastic Comb: Highly airtight, moisture-resistant, and low-maintenance. Excellent for players practicing rigorous bending and overblowing techniques.
Aluminum/Metal Comb: Adds weight and provides a bright, cutting tone with direct feedback—a favorite for modern blues and rock harpists.
Sealed Wood Comb: Offers a warm, organic, retro sound ideal for acoustic blues and folk. Look for moisture-sealed options to prevent swelling.
Reed Material & Airtightness:
Smooth bending and fast articulation demand tight tolerances. High-grade phosphor bronze or stainless steel reeds deliver longevity, quicker response, and better pitch stability during hard bending.
2. Which Key Should You Buy Next? (Google Trends Insights)
Most players start with the Key of C. However, search trends like "best harmonica key after C" and "harmonica keys for blues" highlight a common next step: exploring 2nd Position (Cross Harp).
Key of A (Top Recommendation): Playing an A harp in 2nd position puts you in the key of E—the most popular key for blues guitarists. Its lower pitch makes bending feel smooth and natural.
Key of G: The lowest standard tuning key. It produces a deep, rich tone suitable for soulful blues and traditional country melodies.
Key of D: Bright and punchy, making it perfect for fast-paced rock riffs and uptempo folk tunes.
3. Defining Your Path: Advanced Diatonic vs. Chromatic Alternative
As you upgrade, clarify your musical direction:
Path A: Deepen Your Diatonic & Blues Skills
If you love the raw expression, bends, and overblows of blues, rock, or folk, stick with a high-precision diatonic harmonica optimized for airtightness.
Path B: Explore Chromatic Versatility
If your focus shifts toward complex pop melodies, classical pieces, or jazz without relying heavily on bending techniques, adding a Chromatic Harmonica to your collection offers a smooth, slide-assisted chromatic scale.
4. Pro Tip: Quality Over Quantity
Avoid cheap multi-harp bundles. Investing in 1 or 2 high-performance harmonicas will yield far better tone, easier bending, and faster progress than a box of low-grade instruments.
Adjusting the reed gap—the distance between the tip of the unplayed reed and the reedplate—is one of the single most effective customizations you can perform on a 10-hole diatonic harmonica. Proper gapping drastically reduces air loss, making bending smoother and enabling overblows and overdraws.
What Reed Gapping Does
For Bending: Lowering the gap reduces the air volume required to choke or bend a note, giving you greater control over pitch bends with less breath pressure.
For Overblows / Overdraws: An overblow requires the blow reed to "choke" (stop vibrating) while forcing the opposing draw reed into vibration. If the gap on either reed is too wide, air leaks past, causing squeals or complete failure to pop the note.
Tools You Will Need
Small Phillips or Flathead Screwdriver: To remove cover plates and reedplates.
Gapping Tool: A toothpick, plastic shim, needle, or brass feeler gauge (avoid hard steel tools that can scratch or gouge the brass reed).
Good Lighting & Magnification: Essential for seeing gaps less than 1 millimeter.
Step-by-Step Gapping Process
Unscrew and remove the top and bottom cover plates. You will see two reedplates mounted on the comb:
Top reedplate: Blow reeds (mounted inside the slot, flexing inward).
Bottom reedplate: Draw reeds (mounted on the outside, flexing outward).
Look at the profile of the reed slot against a light source.
Standard Playing / Bending: The gap at the tip of the reed should ideally equal 1 to 1.5 times the thickness of the reed tip.
Overblow Setup: The gap should be tightened to 0.5 to 1 reed thickness—just high enough that the reed doesn't choke during standard playing, but low enough to choke easily under overblow air pressure.
Because draw reeds sit on the outer surface of the reedplate, they are the easiest to adjust:
To Narrow the Gap: Gently press near the base/middle of the reed toward the slot with your tool until the tip settles closer to the plate.
To Widen the Gap: Place your tool or a thin shim under the tip of the reed and lift gently upward away from the plate.
Blow reeds are attached to the inside face of the top reedplate:
To Narrow the Gap: Insert your tool through the slot from the outside and push gently against the blow reed near its base/middle, pushing it inward.
To Widen the Gap: Insert your tool under the tip of the blow reed from inside the comb/slot and press outward.
Reassemble the harmonica loosely with cover plates and test each hole using your normal breath force:
If a note chokes or fails to sound: The gap is too tight. Increase the gap slightly.
If a note requires too much air to bend or squeals on an overblow: The gap is too wide. Close the gap slightly.
Pro Tip: Always adjust both the blow AND draw reeds in the target hole when setting up for overblows. An overblow on hole 4 requires the Hole 4 Blow reed to choke quickly so the Hole 4 Draw reed can sound the overblown pitch ($E\flat$ on a C harmonica).