Advanced Harmonica Tuning: Gapping, Embossing, and Airflow Sealing for Pro Performance
Factory-standard harmonicas are built for general durability, often sacrificing the subtle tolerance levels required for advanced techniques such as overblowing, overdrawing, and dynamic low-pressure articulation. To convert a stock instrument into a custom, stage-ready harmonica, players must fine-tune the airflow dynamics, reed profiling, and slot tolerances.
This technical guide covers three essential advanced customization methods: Reed Gapping, Slot Embossing (Sizing), and Comb Airflow Sealing.
1. Precision Reed Gapping: Balancing Air Pressure and Response
Reed gapping refers to setting the vertical distance between the tip of the unpitched reed and the surface of the reed plate. The gap height determines both the minimum air pressure needed to initiate sound and the reed's resistance to choking under heavy breath pressure.
The Impact of Gap Height on Playability
| Gap Setting | Physical Characteristic | Advantages | Disadvantages | Ideal Application |
| High Gap | Reed tip sits higher above the plate | Handles high breath pressure without choking | Requires high air volume; overblows are extremely difficult | Heavy Blues / Rock hard-blowing |
| Low Gap | Reed tip rests close to the slot plane | Instant response to light breath; effortless overblows | Susceptible to choking under heavy pressure | Jazz / Classical / Overblow style |
Step-by-Step Gapping Procedure
Inspect Initial Arc: Hold the reed plate up to a light source to observe the natural curve profile from the rivet pad to the tip.
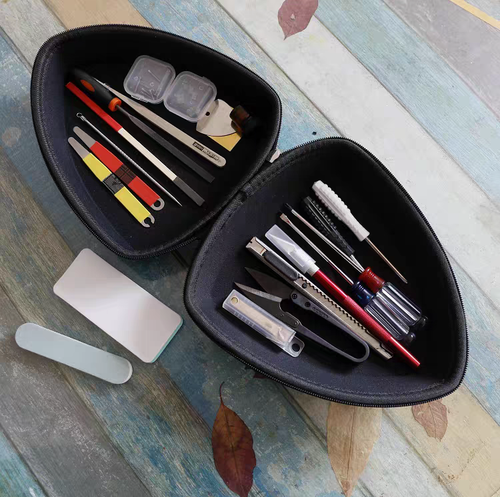
Adjust the Base: Place a feeler gauge or reed tool under the reed near the rivet/weld area to set the foundational elevation.
Establish a Progressive Curve: Ensure the reed enters the slot with a continuous, gentle curve rather than a sharp bend at the tip. Target a gap offset equivalent to 1.0x to 1.5x the thickness of the reed tip.
2. Slot Embossing (Sizing): Minimizing Air Loss via Tolerance Reduction
Embossing is the process of burnishing the edges of the reed slot using a hardened metal sphere or specialized tool. By burnishing the brass edges inward, you decrease the clearance between the sides of the reed and the slot walls.
Why Embossing Improves Tone and Efficiency
Dramatically Reduces Lateral Air Leakage: Air that would normally bypass the reed without contributing to vibration is contained within the active air column.
Maximizes Acoustic Efficiency: More kinetic energy from your breath is directly transferred into reed oscillation, resulting in a richer harmonic profile and wider dynamic range.
Critical Considerations During Embossing
Tolerance Boundaries: Target lateral clearances around 0.01mm to 0.02mm. Over-embossing will cause the reed to scrape against the slot walls, creating unwanted metallic buzzing or complete reed blockage.
Centering and Alignment: Always conduct a lightbox inspection post-embossing. Use a centering shim or needle near the rivet base to correct any lateral drift before reassembly.
3. Air Leakage Mitigation & Comb Sealing
Even perfectly gapped and embossed reeds underperform if air escapes between structural components. Air leakage primarily occurs along the interface between the reed plates and the comb.
Three Steps to Achieving an Airtight Seal
Comb Flattening (Lapping):
Lapping the comb upper and lower surfaces using 800- to 1500-grit wet sandpaper mounted on a flat granite or glass slab eliminates micro-warping inherent in wood or plastic molding.
Reed Plate Flattening:
Inspect screw holes on the reed plate for raised burrs or deformation caused by over-tightening, ensuring a flat mating surface.
Torque Distribution:
When reassembling, apply screws in a cross-pattern sequence starting from the center outward to ensure even pressure across the entire surface without bowing the plates.
FAQ: Advanced Troubleshooting
Q: Why are overblows still failing after setting a low gap on the blow reed?
A: An overblow requires dual-reed control. While the blow reed must be gapped correctly, the draw reed must choke cleanly. If the draw reed gap is too high or improperly curved, it will fail to choke, causing air leakage that prevents the overblow pitch from sounding.
Q: Does embossing increase the risk of reed choking during live performances?
A: Yes. Because embossing tightens tolerances significantly, moisture build-up or microscopic debris can cause temporary reed sticking. Embossed harmonicas require regular maintenance and refined breath control.
Would you like to adjust any specific technical details or add internal links to particular tools and accessories on your storefront?